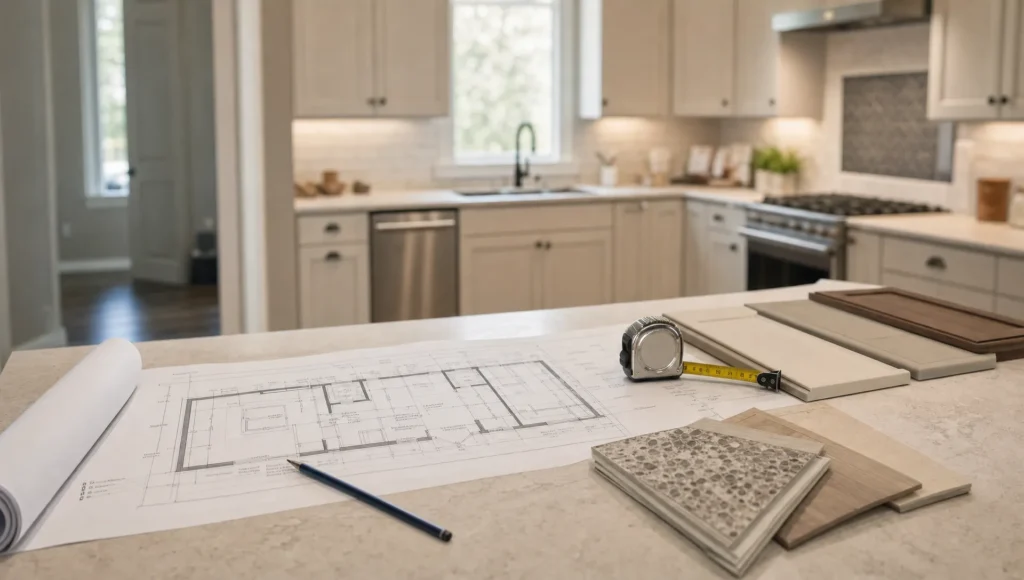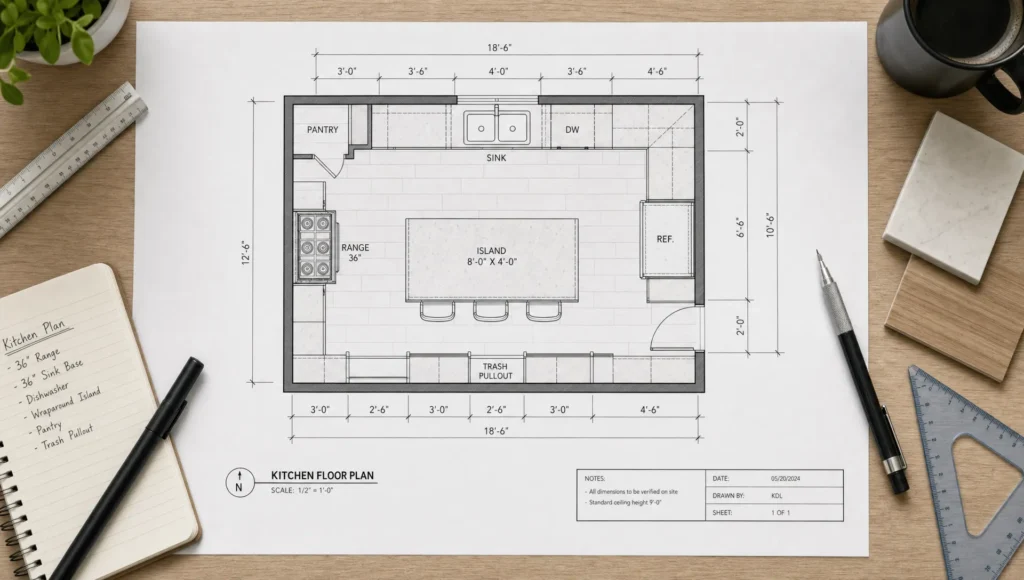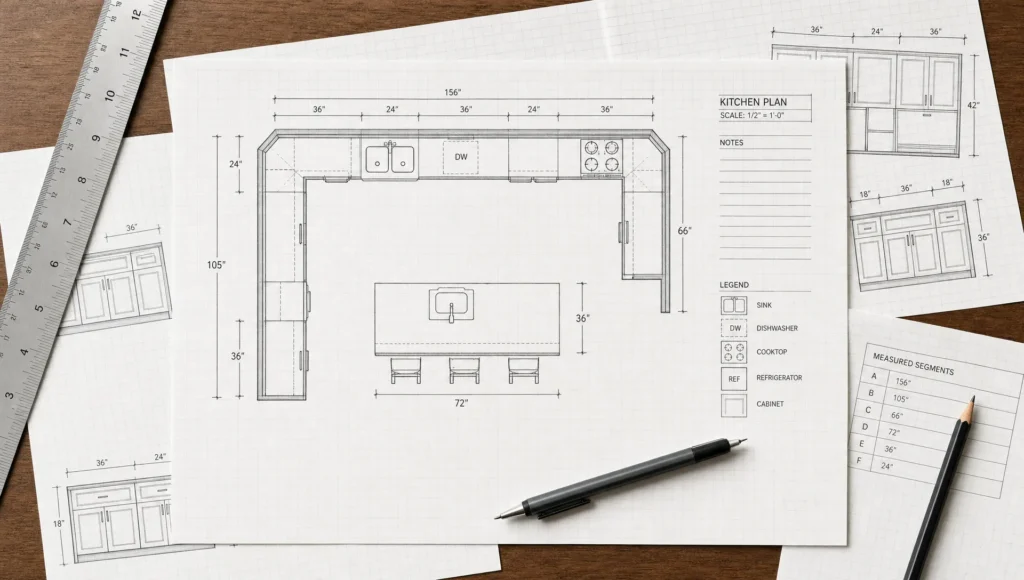
A kitchen floor plan with dimensions is the difference between a kitchen that looks good on paper and one that works when cabinet doors, appliance handles, stools, and people are all in motion. Even a beautiful remodel can feel frustrating if the refrigerator blocks a walkway or an island leaves too little room to open the dishwasher.
The good news is that you do not need to be an architect to create a useful kitchen plan. You need accurate measurements, a clear scale, and a practical way to show walls, openings, fixtures, cabinets, appliances, and clearances. This guide walks you through the process from blank room to dimensioned layout.
Why dimensions matter before you choose finishes
It is tempting to start with cabinet colors, countertops, backsplash tile, or lighting. Those choices matter, but they depend on the layout. A kitchen floor plan with dimensions tells you what will actually fit, where movement happens, and how much storage and counter space you can realistically gain.
A dimensioned plan helps you answer questions like: Can a 36 inch refrigerator fit beside the pantry? Is there enough room between the island and the sink run? Will the oven door block traffic? Can two people cook at the same time without bumping into each other?
It also makes conversations with contractors, cabinet suppliers, electricians, plumbers, and designers much easier. Instead of describing ideas verbally, you can point to a measured plan and discuss specific changes.
Start with the right tools

You can create a kitchen floor plan with dimensions using simple materials or digital tools. Graph paper is often enough for an early sketch, while design software can help later when you want 3D views or cabinet elevations.
For most homeowners, the best starting kit includes a tape measure or laser measure, graph paper, pencil, eraser, straightedge, painter’s tape, and a phone camera. If you are planning a remodel, take photos of every wall before you start drawing. Photos help you remember outlet locations, vents, trim, ceiling changes, and awkward corners.
For a hand-drawn plan, use a consistent scale. A simple scale is 1 square equals 6 inches, or 1 square equals 1 foot for a rough first draft. If your kitchen is small or detailed, the 6 inch scale gives you more room to show cabinets and appliances accurately.
Add fixed features before movable ideas
A realistic kitchen floor plan with dimensions separates fixed features from flexible design decisions. Fixed features include exterior walls, major windows, structural posts, stairs, plumbing stacks, gas lines, and sometimes existing venting.
Some features can be moved, but they may add cost. A sink can move, for example, but relocating plumbing across the room is usually more expensive than keeping it near the current rough-in. A range hood can move too, but venting through an exterior wall may be easier than venting across a ceiling.
Mark these fixed or costly-to-move items clearly on your plan. This helps you decide where it is worth spending money and where the layout should adapt to the house.
If you want a more visual planning approach before committing to a final layout, Kitchen Campaign’s guide to kitchen drawings that help you plan every detail is a useful companion to this dimensioned floor plan process.
Use standard kitchen dimensions as a starting point
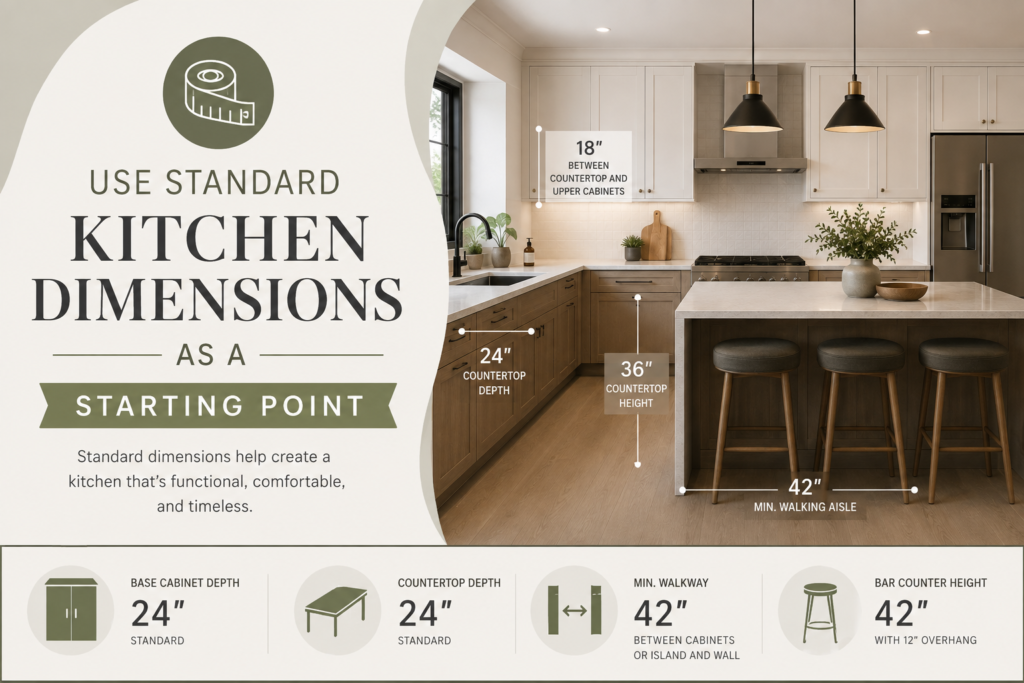
A kitchen floor plan with dimensions with dimensions should show the room size, but it should also include the sizes of the items inside the room. Cabinets and appliances vary by brand and style, so always confirm final specifications before ordering. Still, standard dimensions are helpful for early planning.
| Kitchen element | Common dimension | Planning note |
|---|---|---|
| Base cabinet depth | 24 inches | Countertop usually extends to about 25 to 25.5 inches |
| Base cabinet height with countertop | 36 inches | Standard working height for many kitchens |
| Wall cabinet depth | 12 inches | Some modern wall cabinets are 15 inches deep |
| Tall cabinet depth | 24 inches | Often used for pantries and oven cabinets |
| Countertop to wall cabinet gap | 18 inches | Common working clearance above counters |
| Dishwasher width | 24 inches | Usually placed near the sink |
| Standard range width | 30 inches | Wider pro-style ranges need more room |
| Common refrigerator width | 30 to 36 inches | Confirm door swing, depth, and ventilation space |
| Common sink base cabinet | 30 to 36 inches | Larger sinks may need a wider base |
For deeper cabinet planning, especially if you are comparing base, wall, and tall cabinet sizes, see this detailed guide to kitchen cabinet depth in 2026.
Plan clearances, not just cabinets
One of the most common layout mistakes is drawing only the cabinets and forgetting the empty space. In a kitchen, empty space is working space. It allows you to open doors, stand at the sink, pull out drawers, pass behind a stool, and move hot pans safely.
The National Kitchen & Bath Association is widely referenced by kitchen professionals for planning guidelines. Exact recommendations can vary by project, but the following clearances are reliable starting points for most residential kitchens.
| Area | Recommended planning clearance | Why it matters |
|---|---|---|
| General walkway | At least 36 inches | Allows comfortable movement through the room |
| One-cook work aisle | About 42 inches | Gives room to open drawers and work at counters |
| Two-cook work aisle | About 48 inches | Helps two people move and cook at once |
| Island to cabinet run | 42 to 48 inches | Prevents the island from crowding appliances |
| Behind island seating with no traffic | About 36 inches | Allows stools to pull out |
| Behind seating with traffic | 44 to 48 inches or more | Lets people pass behind seated diners |
| Dishwasher near sink | Adjacent or very close | Makes rinsing and loading easier |
| Refrigerator landing area | Counter space nearby | Gives you a place to set groceries and ingredients |
Do not treat these clearances as wasted space. A kitchen with fewer cabinets and better circulation can feel larger and work better than a kitchen packed too tightly.
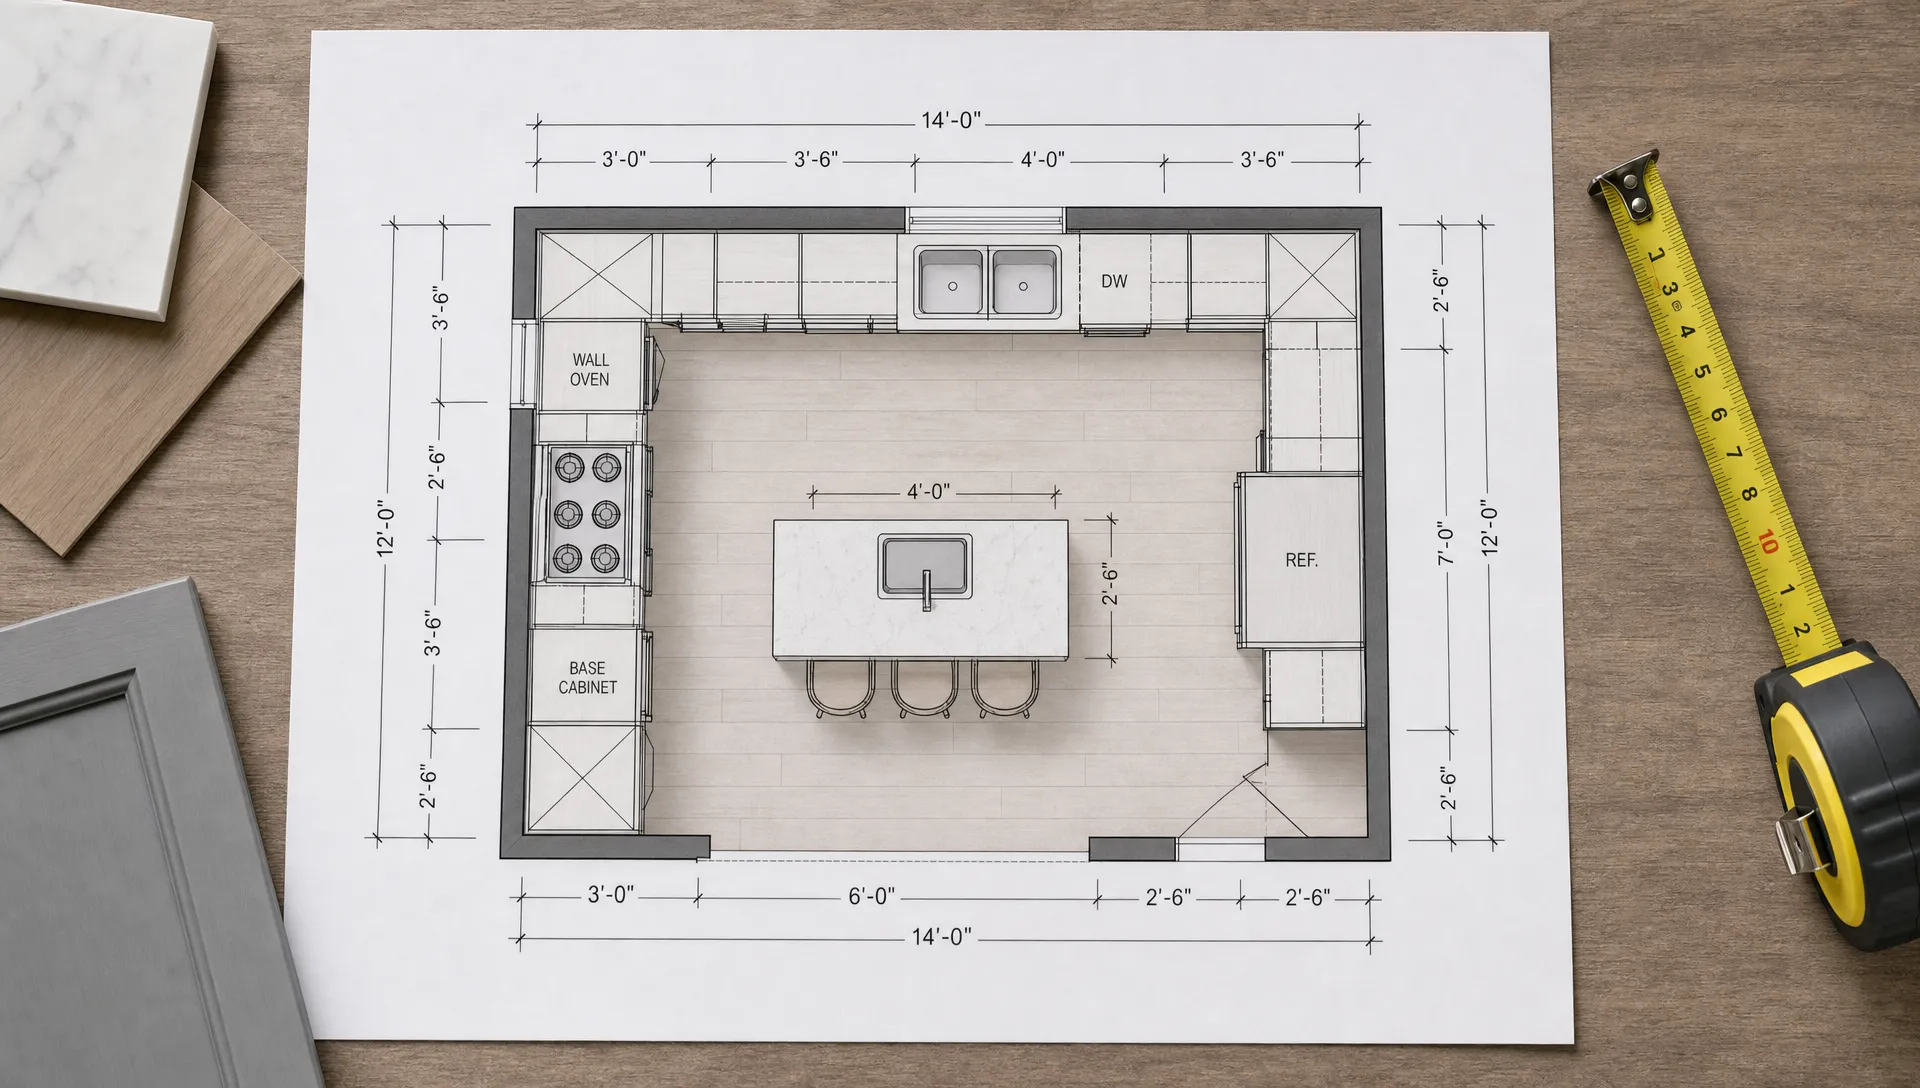
Choose the best layout for your room shape
Once the room shell and clearances are drawn, you can test layout options. Most kitchens fall into a few common categories: one-wall, galley, L-shaped, U-shaped, peninsula, or island layouts.
A one-wall kitchen floor plan with dimensions works well in compact homes, studios, and open-plan spaces. The main challenge is creating enough counter space between the sink, cooktop, and refrigerator.
A galley kitchen uses two parallel runs. It can be extremely efficient because everything is close, but aisle width becomes critical. If your room is narrow, review these galley kitchen layout ideas before deciding where to place appliances and storage.
An L-shaped kitchen is flexible and often works well in open spaces. It can leave room for a dining table or island, depending on the size of the room.
A U-shaped kitchen offers generous counter space and storage, but it needs enough width to avoid feeling boxed in. Pay special attention to corner cabinet access.
An island layout can add prep space, seating, and storage, but only if the surrounding clearances work. If the plan feels tight, a narrower island, movable cart, or peninsula may be more practical. For inspiration that balances seating and storage, explore these kitchen island with seating and storage ideas.
Place the sink, range, and refrigerator with purpose
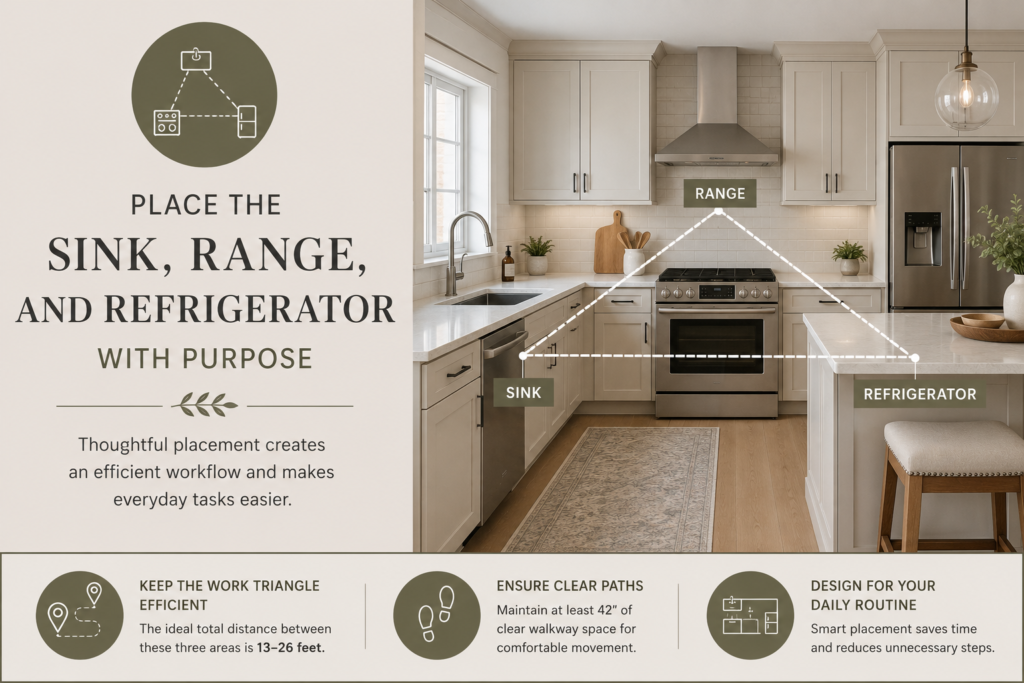
The classic kitchen floor plan with dimensions work triangle connects the sink, range, and refrigerator. It is still useful, but modern kitchens also need zones for prep, cleanup, coffee, baking, charging devices, and sometimes homework or entertaining.
Start with the sink because it is often tied to plumbing and a window. Then place the dishwasher close to the sink, ideally on the side that feels natural for loading. Next, position the range or cooktop with safe counter space nearby. Finally, place the refrigerator where family members can access it without crossing directly through the cooking zone.
Think about the flow of a normal meal. You take food from the refrigerator, set it down, wash or prep it, cook it, plate it, and clean up. A kitchen floor plan with dimensions should support that sequence without forcing unnecessary steps.
Add dimension lines clearly
A good kitchen floor plan with dimensions has dimensions that someone else can read without guessing. Use dimension lines outside the main drawing where possible. Put overall room dimensions first, then show smaller segments such as corner to window, window width, window to door, and door width.
For cabinets, dimension each run from one end to the other. Then label individual cabinet widths inside the run. This makes it easier to check that the pieces add up.
For example, a 144 inch wall run might include a 3 inch filler, 24 inch dishwasher, 36 inch sink base, 24 inch drawer base, 30 inch range, 3 inch filler, and 24 inch base cabinet. Together, that equals 144 inches. If your cabinet math does not match the wall measurement, something needs to change before you order.
Test the plan with real movement
Before you finalize the kitchen floor plan with dimensions, walk through it physically. Use painter’s tape on the floor to mark cabinet edges, island corners, and appliance locations. This simple step often reveals problems that drawings hide.
Stand where you would chop vegetables. Pretend to open the oven. Walk from the refrigerator to the sink. Pull out an imaginary dishwasher rack. Sit where stools would go. If the layout feels tight with tape on the floor, it will probably feel tight after cabinets are installed.
This is also the moment to check accessibility needs. If anyone in the household uses mobility aids or may need easier access in the future, review wider clearances and reachable storage heights. The ADA Standards for Accessible Design are not required for every private home, but they can provide helpful reference points for accessible planning.
Example: a simple 10 by 12 foot kitchen plan
Imagine a kitchen floor plan with dimensions with dimensions that is 10 feet wide by 12 feet long, with one window centered on the long wall and an open entry on one short side. Your plan might place the sink under the window, the dishwasher immediately to one side, the range on the same wall with landing space nearby, and the refrigerator on the adjacent wall near the entry.
A 12 foot wall equals 144 inches. One possible cabinet run could include a 24 inch dishwasher, 36 inch sink base, 24 inch drawer base, 30 inch range, and additional base storage with fillers as needed. On the adjacent wall, a 36 inch refrigerator and pantry cabinet could create a food storage zone near the entrance.
This is only an example, not a universal formula. The right solution depends on door locations, window height, plumbing, appliance specs, and how your household cooks. The point is to make every inch visible on paper before decisions become expensive.
Common mistakes to avoid
The biggest mistake is measuring only once. Measure at least twice, and measure in more than one place. Walls, floors, and ceilings are not always perfectly straight.
Another mistake is ignoring trim. Door casing, window casing, baseboards, and thick tile can affect cabinet fit. A cabinet that technically fits between two walls may still need filler space so drawers and doors open properly.
Do not forget appliance depth. Counter-depth and standard-depth refrigerators can change the feel of a kitchen dramatically. Handles also project into walkways, so include them in your clearance thinking.
Finally, avoid designing an island just because it is popular. An island should improve the kitchen, not make every aisle narrower. If the clearances do not work, choose a peninsula, smaller island, or better perimeter storage instead.
Final checklist before you share or build from the plan
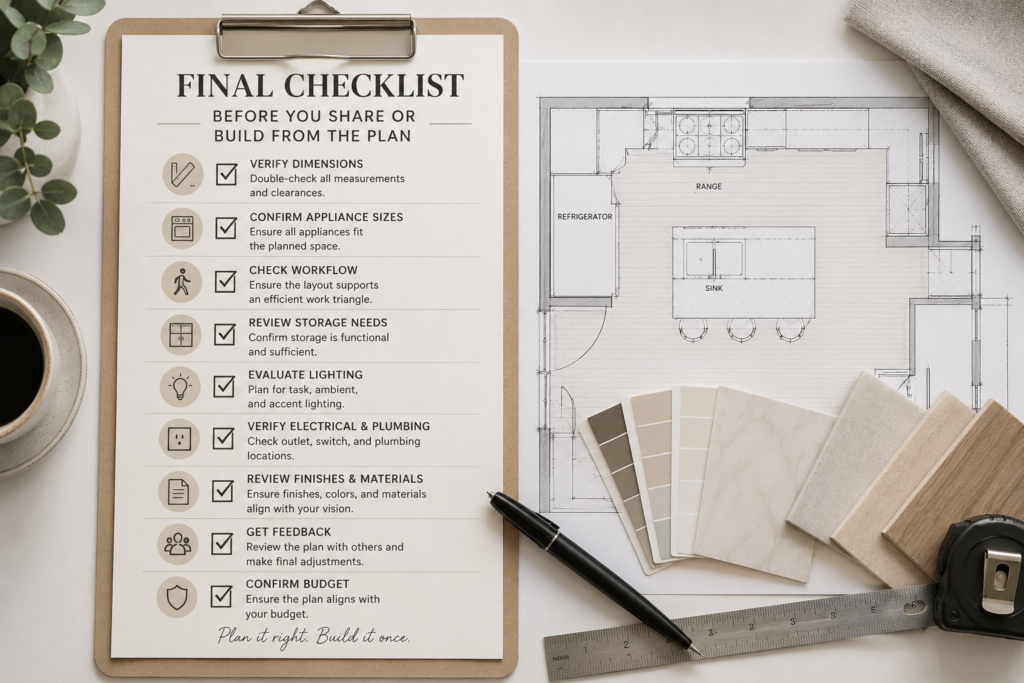
Before you send your kitchen floor plan with dimensions to a contractor, cabinet company, or designer, review it carefully. A complete dimensioned kitchen plan should include the overall room size, wall segment measurements, doors, windows, ceiling height, plumbing, electrical, vents, cabinet widths, appliance sizes, clearances, and notes about anything unusual.
It should also show which measurements are confirmed and which are still approximate. If you have not chosen appliances yet, label those dimensions as placeholders. Once you select actual models, update the plan with manufacturer specifications.
Bring your kitchen plan to life
A dimensioned floor plan gives you control over your kitchen remodel before money is spent on cabinets, counters, appliances, or labor. Start with the room shell, add fixed features, use standard dimensions wisely, and test every clearance as if you were already cooking in the space.
For more kitchen design inspiration, layout ideas, storage strategies, and practical planning tips, explore Kitchen Campaign as you turn your measurements into a kitchen that feels beautiful, functional, and easy to use every day.
Conclusion: Create a Kitchen Floor Plan With Dimensions
Creating a kitchen floor plan with dimensions gives you a clear picture of how your kitchen will function before you spend money on cabinets, appliances, countertops, or remodeling work. Start with accurate room measurements, mark doors and windows, identify fixed features, and then plan cabinets, appliances, work zones, and clearances.
Remember that a successful kitchen is not simply about fitting everything into the available space. It should provide comfortable movement, practical storage, sufficient counter space, and an efficient workflow. Use your kitchen floor plan with dimensions to test different layouts and make adjustments before construction begins.
Whether you choose a single-wall, galley, L-shaped, U-shaped, peninsula, or island layout, accurate dimensions will help you create a kitchen that is both beautiful and practical for everyday living.
FAQ’S…
How to layout a kitchen floor plan?
Start by measuring the room, including walls, doors, windows, and utility points. Then place the main work zones—refrigerator, sink, and cooktop—within an efficient workflow. Use a kitchen floor plan with dimensions to check cabinet depths, aisle widths, appliance clearances, and island spacing before finalizing the layout.
What is the 2026 trend for kitchens?
In 2026, kitchens are focusing on warm, practical, and personalized designs. Natural wood, soft neutral colors, concealed storage, statement islands, layered lighting, and mixed materials are popular. A kitchen floor plan with dimensions also helps homeowners create layouts that balance modern style with comfortable movement and everyday functionality.
What are the 5 basic kitchen layouts?
The five basic kitchen layouts are single-wall, galley, L-shaped, U-shaped, and island kitchen layouts. Each works best in different spaces and lifestyles. Comparing a kitchen floor plan with dimensions makes it easier to understand cabinet placement, work zones, walking space, and the room required for each layout.
What is the perfect size of a kitchen?
There is no single perfect kitchen size because it depends on the layout, household, and available space. A well-planned kitchen should provide comfortable work areas, adequate storage, and clear walking paths. A kitchen floor plan with dimensions helps determine the right proportions for cabinets, appliances, counters, and islands.
What is the best type of kitchen plan?
The best kitchen plan depends on your room size, cooking habits, storage needs, and household. L-shaped, U-shaped, galley, and single-wall layouts can all work well. Creating a kitchen floor plan with dimensions allows you to compare each option and choose the arrangement that uses your available space most effectively.
What is the most modern kitchen design?
A modern kitchen typically combines clean lines, simple cabinetry, integrated appliances, functional storage, minimal decoration, and layered lighting. Natural materials and warm neutral colors can soften the look. A kitchen floor plan with dimensions helps ensure the modern design also provides practical circulation, appliance clearances, and comfortable working zones.