Have you ever walked into your kitchen and felt like it belonged in another decade? Maybe the oak cabinets have turned yellow over time, the once-rich wood finish now looks dull, or the entire space feels darker than you’d like. The good news is that you don’t always need an expensive kitchen remodel to breathe new life into your home.
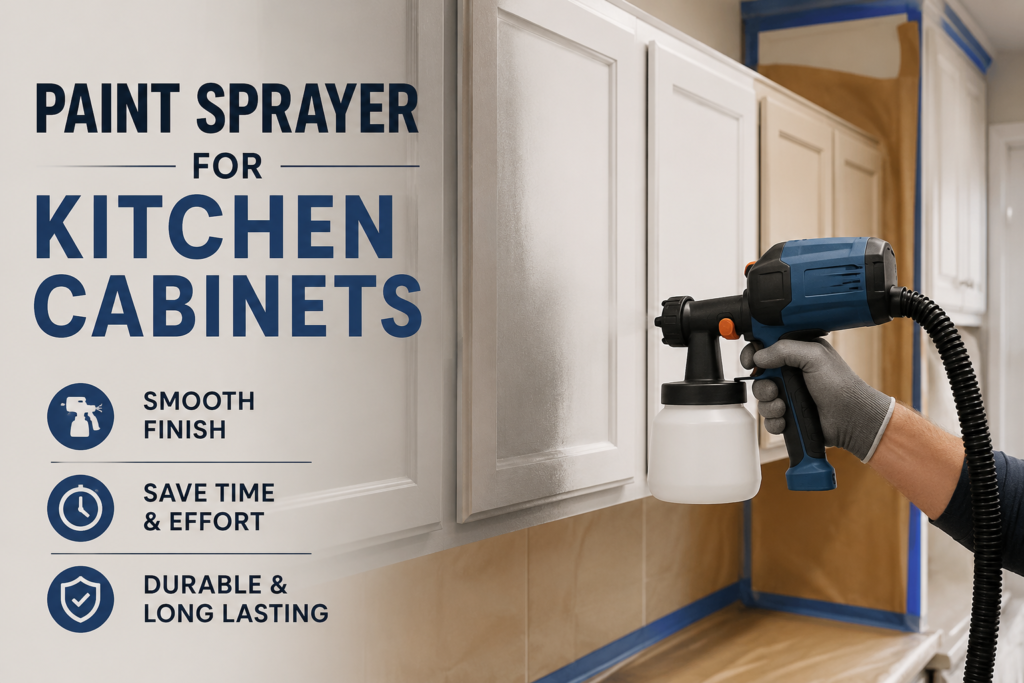
One of the most effective and budget-friendly ways to transform your space is by using a paint sprayer for kitchen cabinets. Instead of spending thousands of dollars replacing perfectly solid cabinets, you can give them a completely fresh appearance with professional-quality paint and the right spraying equipment.
In recent years, homeowners and professional painters alike have embraced cabinet spraying because it delivers a smoother, faster, and more durable finish than traditional brushes or rollers. Whether you’re refreshing old oak cabinets, modernizing cherry wood, or giving maple cabinets a contemporary makeover, the right paint sprayer can produce results that closely resemble factory-finished cabinetry.
In this comprehensive guide, you’ll learn everything you need to know—from choosing the best paint sprayer for kitchen cabinets to preparing surfaces, selecting paints and primers, mastering spray techniques, and avoiding costly mistakes. By the end, you’ll have the confidence to achieve a stunning kitchen transformation that looks professionally finished.
Professional Paint Sprayer for Kitchen Cabinets: Why More Homeowners Are Choosing to Spray
For years, painting kitchen cabinets meant spending days with brushes and foam rollers, hoping to avoid visible brush strokes and uneven finishes. Today, that process has changed dramatically.
A professional paint sprayer for kitchen cabinets allows paint to be applied in an ultra-fine mist, creating an even coating that levels beautifully as it dries. This method produces a smooth, factory-like finish that’s difficult to achieve with traditional painting tools.
Imagine transforming a dated kitchen over a weekend instead of replacing every cabinet. That’s exactly what many homeowners have done. One family with aging oak cabinets decided against a costly renovation and instead invested in quality primer, cabinet enamel, and an airless paint sprayer. The result? Their kitchen looked brighter, cleaner, and significantly more modern for a fraction of the cost of new cabinetry.
Beyond appearance, spraying cabinets saves time. Once preparation is complete, multiple cabinet doors and drawer fronts can be coated quickly with consistent coverage.
Benefits of Using a Paint Sprayer for Kitchen Cabinets
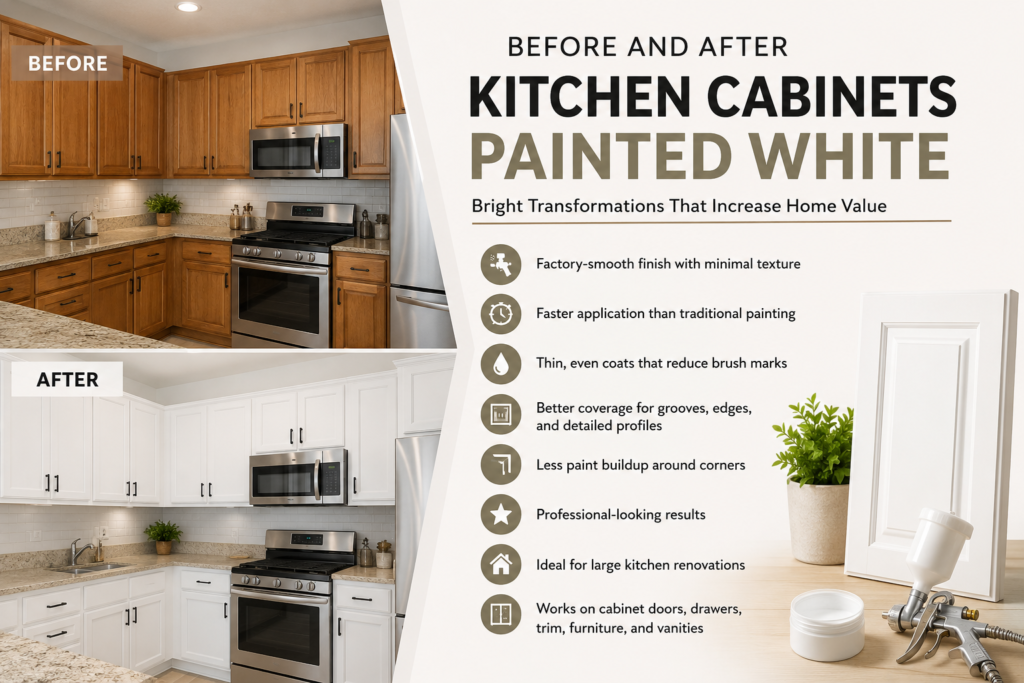
Choosing a cabinet paint sprayer offers several advantages over brushes and rollers:
- Factory-smooth finish with minimal texture
- Faster application than traditional painting
- Thin, even coats that reduce brush marks
- Better coverage for grooves, edges, and detailed profiles
- Less paint buildup around corners
- Professional-looking results
- Ideal for large kitchen renovations
- Works on cabinet doors, drawers, trim, furniture, and vanities
When paired with proper preparation and quality cabinet paint, a sprayer can completely transform tired-looking cabinetry.
Best Paint Sprayer for Kitchen Cabinets: What Makes One Better Than Another?
Not every paint sprayer is designed for cabinet work. Some models are built for fences, decks, and exterior walls, while others are specifically engineered to produce the fine finish required for cabinetry.
When searching for the best paint sprayer for kitchen cabinets, consider these important features.
Fine Finish Capability
Cabinets require smooth, controlled paint application paint sprayer for kitchen cabinets.
A quality sprayer should atomize paint into tiny droplets that level naturally without creating heavy orange peel or noticeable texture.
The finer the spray pattern, the closer your cabinets will resemble factory-finished furniture.
Adjustable Pressure
Different paints require different pressure settings.
Being able to adjust pressure helps prevent:
- Runs
- Drips
- Overspray
- Uneven coverage
Lower pressure often provides greater control, while higher pressure can improve atomization for thicker coatings.
Consistent Paint Flow
Nothing is more frustrating than inconsistent spraying.
Premium sprayers maintain a steady flow of paint throughout the project, helping every cabinet door receive the same smooth finish.
Easy Cleanup
Cleaning a sprayer may seem intimidating at first, but modern systems are designed to simplify the process.
Many professional-grade models include quick-flush systems that allow fast cleaning after each project.
Durability
Kitchen renovations often lead to additional DIY projects.
A quality sprayer can also be used for:
- Interior walls
- Furniture
- Doors
- Built-in shelving
- Bathroom vanities
- Exterior trim
Investing in durable equipment provides value well beyond a single cabinet makeover.
Airless vs. HVLP: Which Paint Sprayer Is Better for Kitchen Cabinets?
One of the most common questions homeowners ask is whether they should choose an airless sprayer or an HVLP (High Volume Low Pressure) system paint sprayer for kitchen cabinets.
Both have advantages, but the right choice depends on your project size and desired finish.
| Feature | Airless Sprayer | HVLP Sprayer |
|---|---|---|
| Speed | Excellent | Moderate |
| Finish Quality | Excellent | Excellent |
| Large Projects | Outstanding | Good |
| Fine Detail Work | Very Good | Excellent |
| Paint Thinning | Usually Not Required | Often Required |
| Learning Curve | Moderate | Easy |
| Coverage Speed | Very Fast | Slower |
Airless Paint Sprayers
An airless sprayer uses high pressure to force paint through a tiny tip, creating a fine spray without compressed air paint sprayer for kitchen cabinets.
Advantages include:
- Extremely fast coverage
- Handles unthinned latex paint
- Excellent for full kitchens
- Produces consistent results
- Ideal for professionals and experienced DIY users
Airless sprayers are often the preferred choice for homeowners painting an entire kitchen because they significantly reduce project time.
HVLP Paint Sprayers
HVLP stands for High Volume Low Pressure.
Instead of relying solely on pressure, these sprayers use a large volume of air to deliver paint gently onto the surface paint sprayer for kitchen cabinets.
Benefits include:
- Greater control
- Less overspray
- Excellent for furniture
- Easy for beginners
- Fine finish on smaller projects
If you’re only painting a vanity or a few cabinet doors, an HVLP sprayer may be sufficient. For larger kitchen remodels, many professionals favor airless systems due to their efficiency.
Best Paint Sprayer for Cabinets and Furniture: One Tool, Endless Possibilities
One of the biggest advantages of buying a quality cabinet sprayer is its versatility.
The best paint sprayer for cabinets and furniture isn’t limited to kitchens—it becomes a valuable tool for countless home improvement projects.
You can use the same sprayer to refinish:
- Bathroom vanities
- Built-in bookcases
- Dining tables
- Dressers
- Interior doors
- Closet systems
- Window trim
- Fireplace mantels
- Home office furniture
Because these projects require a similarly smooth finish, a cabinet sprayer performs exceptionally well across different surfaces paint sprayer for kitchen cabinets.
This versatility makes investing in a quality sprayer more economical than purchasing separate tools for each project.
Why Spraying Cabinets Creates a Better Finish Than Brushing
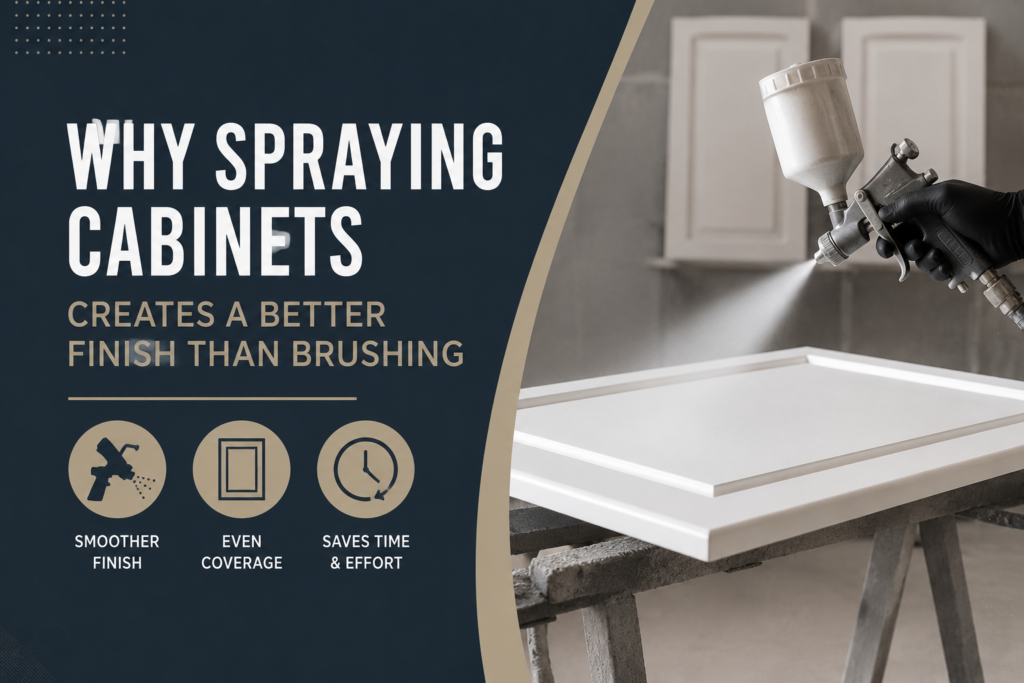
Although modern foam rollers have improved significantly, they still leave behind subtle texture. Brushes, meanwhile, can create visible strokes if the paint begins to dry before leveling.
A paint sprayer for kitchen cabinets applies paint as a fine mist, allowing thin, even coats that dry into a smooth finish.
Additional advantages include:
- Uniform color across every cabinet
- Better coverage in corners and grooves
- Faster application on raised-panel doors
- Reduced risk of lap marks
- Cleaner appearance on detailed molding
The key is applying several light coats instead of one heavy coat. Thin layers dry more evenly, reduce the chance of runs, and create a durable finish that stands up to daily kitchen use.
Is Buying a Cabinet Paint Sprayer Worth It?
If you’re planning only a single small project, renting a sprayer or hiring a professional may make sense.
However, if you enjoy DIY projects or have multiple rooms to update, purchasing your own paint sprayer for kitchen cabinets can quickly pay for itself.
Beyond kitchen cabinets, the same tool can be used to refresh furniture, repaint bathroom vanities, finish built-ins, or even tackle walls and trim in future renovations.
For many homeowners, the combination of time savings, professional-looking results, and long-term versatility makes a quality paint sprayer one of the best investments for home improvement.
how to spraying cabinets with airless sprayer step by step, including surface preparation, sanding, masking, choosing the best paint sprayer for kitchen cabinets cupboards, selecting the right primer, adjusting sprayer settings, and avoiding the most common cabinet painting mistakes.
Spraying Cabinets With Airless Sprayer: Step-by-Step Guide for a Professional Finish
Once you’ve chosen the right paint sprayer for kitchen cabinets, the next step is preparing and painting your cabinets correctly. Even the best sprayer can’t produce a flawless finish if the surface isn’t properly cleaned, sanded, and primed.
Professional painters often say that 80% of a successful cabinet painting project happens before the first coat of paint sprayer for kitchen cabinets. Taking the time to prepare carefully will reward you with a durable, factory-like finish that lasts for years.
Let’s walk through the complete process.
Professional Spray Painting Kitchen Cabinets Near Me: Should You DIY or Hire a Pro?
Before picking up a sprayer, many homeowners search for professional paint sprayer for kitchen cabinets near me to compare costs and decide whether hiring a painter is worth it.
Both options have advantages.
Hire a Professional If:
- Your cabinets have extensive damage.
- You don’t have enough workspace.
- You want a guaranteed finish.
- Your kitchen is very large.
- You’re working on luxury cabinetry.
DIY If:
- Your cabinets are structurally sound.
- You enjoy home improvement projects.
- You already own basic tools.
- You want to save thousands of dollars.
- You have time to complete the project carefully.
Many homeowners discover that painting existing cabinets can cost a fraction of replacing them while delivering an equally dramatic visual transformation.
Step 1: Remove Cabinet Doors and Hardware
The first mistake many beginners make is trying to paint cabinet doors while they’re still attached.
Professional painters always remove:
- Cabinet doors
- Drawer fronts
- Hinges
- Handles
- Knobs
- Soft-close hardware
This allows every edge and corner to receive an even coat of paint.
Pro Tip
Label every door before removing it.
Use masking tape and number each cabinet and hinge location.
This simple step saves hours during reinstallation.
Step 2: Clean Every Surface Thoroughly
paint sprayer for kitchen cabinets collect years of grease, cooking oil, fingerprints, and dust.
Paint simply won’t bond well to dirty surfaces.
Use a quality degreaser before sanding.
Popular cleaning options include:
- TSP substitute
- Cabinet degreaser
- Mild detergent solution
- Warm water with microfiber cloth
Pay extra attention around:
- Stove cabinets
- Range hood
- Cabinet handles
- Drawer pulls
- Upper cabinet doors
Even cabinets that “look clean” often have invisible grease buildup.
Step 3: Lightly Sand the Cabinets
One of the biggest myths online is that cabinets don’t need sanding.
Professional painters rarely skip this step.
Light sanding helps:
- Remove gloss
- Improve adhesion
- Smooth imperfections
- Remove small scratches
- Create a surface primer can grip
Most cabinet painters use:
150–220 grit sandpaper
You don’t need to strip cabinets to bare wood.
Instead, lightly scuff the existing finish until it loses its shine.
Step 4: Remove All Dust
After sanding, wipe every surface carefully.
Recommended cleaning sequence:
- Vacuum dust
- Microfiber cloth
- Tack cloth
- Degreaser wipe (if necessary)
Dust left behind becomes trapped beneath the paint.
That’s one of the easiest ways to ruin an otherwise beautiful finish.
Step 5: Repair Small Damage
Now is the perfect opportunity to repair years of wear.
Fill:
- Nail holes
- Small dents
- Chips
- Deep scratches
Allow filler to dry completely before sanding smooth.
These tiny repairs make an enormous difference once the paint is applied.
Step 6: Mask the Kitchen Properly
Professional painters often spend several hours masking before spraying.
Although this seems excessive, it dramatically reduces cleanup later.
Cover:
- Countertops
- Appliances
- Flooring
- Windows
- Walls
- Cabinet interiors
- Ceiling edges
Many professionals use pre-taped plastic sheeting because it’s fast and provides excellent protection from overspray.
Paper floor protection also works well around kitchen islands and walkways.
Step 7: Choose the Right Primer
Primer isn’t optional.
It’s what keeps cabinet paint firmly attached for years.
Choosing the correct primer depends on your cabinet material.
Solid Wood Cabinets
A high-quality bonding primer usually works well.
Oak Cabinets
Oak contains tannins that frequently bleed through white paint.
Use a stain-blocking primer to prevent yellow or brown discoloration.
Laminate Cabinets
These require a primer specifically designed for glossy or melamine surfaces.
Without proper adhesion primer, paint may peel prematurely.
Previously Painted Cabinets
If the existing paint remains well bonded, a bonding primer generally provides excellent results after sanding.
Step 8: Prepare Your Paint Sprayer
Now comes the exciting part.
Before spraying cabinet doors, set up your paint sprayer for kitchen cabinets carefully.
Check:
- Spray tip
- Paint filter
- Pressure setting
- Paint flow
- Pickup tube
- Hose connections
Always strain paint before filling the sprayer.
Even tiny dried paint particles can clog the nozzle.
Paint Sprayer Settings Matter
Every paint sprays differently.
Professional painters never begin directly on cabinet doors.
Instead, they first test the spray pattern on:
- Cardboard
- Scrap wood
- Old cabinet doors
Adjust until the spray appears smooth and even.
If the spray sputters:
- Clean the nozzle
- Increase air pressure (if applicable)
- Reduce paint flow
- Check paint consistency
Testing first prevents expensive mistakes.
Step 9: Practice Proper Spraying Technique
The secret to factory-quality cabinets isn’t expensive equipment paint sprayer for kitchen cabinets.
It’s consistent technique.
Professional painters recommend:
✔ Keep the sprayer moving.
✔ Start moving before pulling the trigger.
✔ Release the trigger after passing the cabinet.
✔ Keep the sprayer approximately 10–12 inches (or the distance recommended for your sprayer) from the surface.
✔ Maintain a consistent speed.
✔ Keep the spray gun perpendicular to the surface whenever possible.
Avoid swinging only your wrist.
Instead, move your entire arm to maintain the same distance across the cabinet.
This creates a much more even finish paint sprayer for kitchen cabinets.
Step 10: Apply Thin Coats
One heavy coat almost always causes problems.
Instead, professionals apply several light coats.
Benefits include:
- Faster drying
- Better durability
- Fewer drips
- Less orange peel
- Smoother finish
- Improved leveling
Although multiple coats require patience, the final appearance is dramatically better.
Best Spray Paint for Kitchen Cupboards: Choosing the Right Paint
Selecting the best paint sprayer for kitchen cabinets cupboards is just as important as choosing a quality sprayer.
Kitchen cabinets experience daily wear from:
- Steam
- Grease
- Moisture
- Frequent cleaning
- Constant opening and closing
Because of this, ordinary wall paint isn’t suitable.
Instead, choose cabinet-specific coatings.
Cabinet Paint Features to Look For
- Excellent adhesion
- Hard curing finish
- Washable surface
- Scratch resistance
- Stain resistance
- Smooth leveling
Many painters prefer cabinet enamels because they cure into an exceptionally durable finish.
Satin vs. Semi-Gloss
Both finishes are popular.
Satin
- Soft appearance
- Modern look
- Hides imperfections
- Lower sheen
Semi-Gloss
- Easier to clean
- More reflective
- Traditional cabinet finish
- Excellent durability
Choose the finish that best matches your kitchen’s style and maintenance preferences.
Common Cabinet Painting Mistakes to Avoid
Even experienced DIYers can run into problems paint sprayer for kitchen cabinets.
Avoid these common mistakes:
- Skipping sanding
- Painting over grease
- Using wall paint
- Applying thick coats
- Rushing drying time
- Ignoring primer
- Forgetting to label cabinet doors
- Spraying too close
- Spraying too slowly
- Reinstalling doors before the paint fully cures
Taking your time with each stage leads to a finish that looks professionally completed rather than obviously repainted.
Expert Tips for a Flawless Finish
Professional painters often rely on small habits that make a big difference:
- Spray cabinet doors horizontally whenever possible to reduce runs.
- Keep your workspace as dust-free as possible during painting and drying.
- If your sprayer begins to spit or spray unevenly, stop and clean the nozzle before continuing.
- Maintain consistent overlap between each spray pass for uniform coverage.
- Allow each coat to dry according to the paint manufacturer’s recommendations before applying the next.
These details may seem minor, but together they help produce the smooth, durable finish homeowners expect from professionally painted cabinets.
Coming Up in Part 3
We’ll compare the best paint sprayer for kitchen cabinets, review top models such as Graco and Wagner, discuss whether buying a sprayer is worth the investment, explore long-term cabinet maintenance, answer frequently asked questions, and wrap up with expert recommendations to help you choose the right equipment with confidence.
Best Paint Sprayer for Kitchen Cabinets: Top Models Worth Considering
After spending hours preparing your cabinets, the last thing you want is a paint sprayer that produces uneven coverage, clogs frequently, or leaves visible texture. Investing in the best paint sprayer for kitchen cabinets can make the difference between an average DIY project and a finish that looks professionally manufactured.
Below are some of the most popular paint sprayers trusted by homeowners and professionals.
Graco Magnum ProX17
If you’re tackling a complete kitchen renovation, the Graco Magnum ProX17 is one of the most recommended airless paint sprayer for kitchen cabinets available.
Best For
- Complete kitchen cabinet makeovers
- Large remodeling projects
- Professional-quality finishes
- Experienced DIY users
Pros
- Sprays paint directly from the bucket
- No paint thinning required for many latex paints
- Adjustable pressure control
- Fast coverage
- Excellent durability
- Produces a factory-like finish
Cons
- Higher initial investment
- Larger than handheld sprayers
- Requires more thorough cleaning
Wagner FLEXiO 5000
The Wagner FLEXiO 5000 is a favorite among DIY homeowners looking for an easy-to-use sprayer that still delivers impressive cabinet finishes.
Best For
- First-time cabinet painters
- Bathroom vanities
- Furniture
- Kitchen cabinets
- Interior projects
Pros
- Fine Finish Nozzle included
- Lightweight design
- Excellent control
- Easy setup
- Minimal learning curve
Cons
- Slower than large airless systems
- Better suited to medium-sized projects
Wagner SuperFinish 23 Plus
Designed with professionals in mind, this sprayer handles demanding cabinet painting jobs with precision.
Best For
- Professional painters
- High-volume cabinet refinishing
- Commercial projects
Pros
- Excellent atomization
- Adjustable pressure
- High productivity
- Consistent spray quality
- Handles a wide range of coatings
Best Paint Sprayer for Cabinets and Furniture: Which One Offers the Most Value?
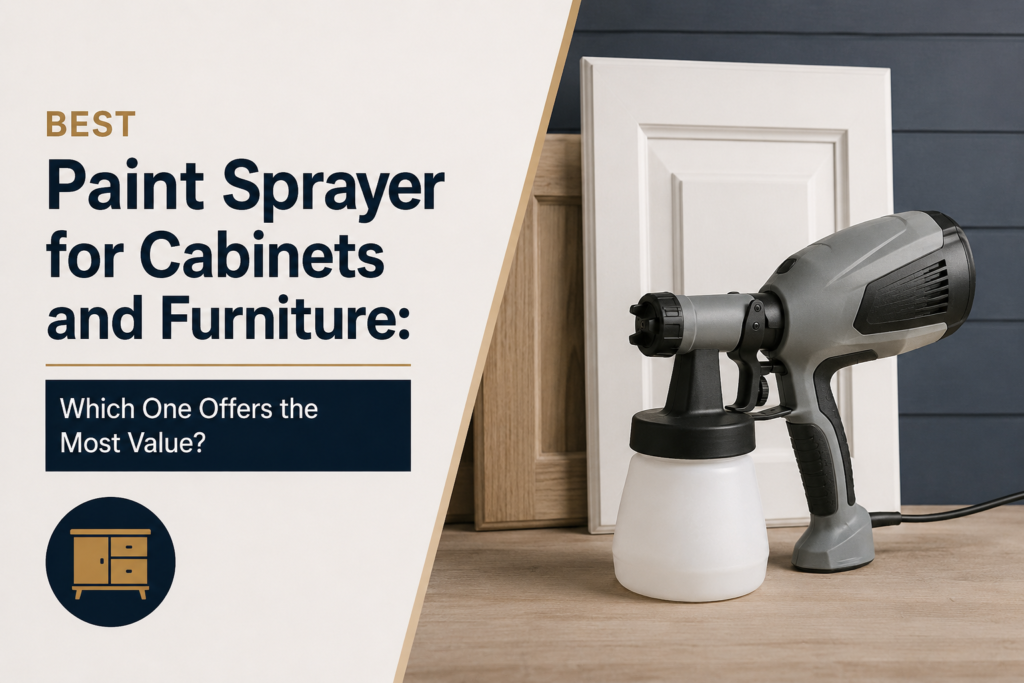
A quality paint sprayer for kitchen cabinets isn’t just for kitchens. It can become one of the most versatile tools in your workshop.
You can use the same sprayer for:
- Kitchen cabinets
- Bathroom vanities
- Built-in shelving
- Dining tables
- Dressers
- Bookshelves
- Interior doors
- Window trim
- Fireplace mantels
- Home office furniture
Because these projects all require smooth finishes, investing in a high-quality sprayer offers long-term value far beyond a single kitchen renovation.
Buying Guide: How to Choose the Right Paint Sprayer for Kitchen Cabinets
Before purchasing a paint sprayer, ask yourself a few simple questions paint sprayer for kitchen cabinets.
How Often Will You Use It?
If this is your only painting project, renting a professional sprayer may be the most economical option.
However, if you enjoy DIY renovations, owning a quality sprayer can save both time and money over multiple projects.
Project Size
Small Projects
Ideal for:
- Bathroom cabinets
- Furniture
- Single vanities
- Small kitchens
A handheld HVLP sprayer is often sufficient.
Large Projects
Ideal for:
- Full kitchens
- Built-in cabinetry
- Whole-house trim
- Multiple renovation projects
An airless sprayer typically provides greater speed and efficiency.
Ease of Cleaning
Many buyers overlook cleanup when choosing a sprayer.
Look for models with:
- Quick-flush systems
- Easy-to-remove spray tips
- Replaceable filters
- Simple disassembly
A sprayer that’s easy to clean is more likely to be maintained properly and last for years.
Budget
Paint sprayers are available in several price ranges.
Entry Level
Perfect for occasional DIY use.
Mid-Range
Excellent balance of quality and affordability.
Professional
Best for contractors or homeowners who plan to complete multiple large projects.
Remember, the cheapest sprayer isn’t always the best value. A higher-quality model often delivers better results, lasts longer, and reduces frustration.
Maintaining Painted Kitchen Cabinets
After investing time and effort into painting your cabinets, proper maintenance helps preserve their appearance.
Clean Gently
Use:
- Mild dish soap
- Warm water
- Soft microfiber cloth
Avoid abrasive scrubbers or harsh chemicals that can dull the finish.
Wipe Spills Quickly
Cooking oils, sauces, and moisture should be cleaned promptly to prevent staining or long-term buildup.
Protect Against Moisture
Although cabinet paints are durable, prolonged exposure to standing water around sinks or dishwashers can eventually affect the finish.
Dry wet areas whenever possible.
Tighten Hardware
Loose handles and hinges can gradually damage freshly painted cabinet doors.
Check hardware every few months and tighten as needed.
Keep Leftover Paint
Store a small amount of the original paint in a sealed container.
It makes future touch-ups quick and ensures an exact color match.
Final Thoughts
Choosing the right paint sprayer for kitchen cabinets is one of the smartest investments you can make if you’re planning to refresh your kitchen without replacing perfectly functional cabinetry. A quality sprayer not only saves time but also delivers a smooth, factory-like finish that’s difficult to achieve with brushes or rollers.
Whether you’re considering a professional paint sprayer for kitchen cabinets, comparing the best paint sprayer for kitchen cabinets, looking for the best paint sprayer for cabinets and furniture, researching professional spray painting kitchen cabinets near me, or learning about spraying cabinets with airless sprayer, success comes down to careful preparation, patience, and using the right equipment.
Don’t rush the process. Clean thoroughly, sand properly, apply a suitable primer, and spray several light coats instead of one heavy coat. These simple practices can transform dated cabinets into a modern focal point while extending their lifespan for years.
If you’re ready to tackle your next DIY project, investing in a reliable paint sprayer is a decision you won’t regret. Beyond kitchen cabinets, it can help you update furniture, bathroom vanities, trim, built-ins, and countless other home improvement projects with professional-quality results.
A well-executed cabinet makeover doesn’t just improve the look of your kitchen—it enhances the entire home. With the right paint sprayer for kitchen cabinets, you can achieve stunning results, save money on a full renovation, and enjoy a beautiful space that feels brand new.
Is a paint sprayer for kitchen cabinets better than using a brush?
In most cases, yes. A paint sprayer creates a smoother, more even finish with fewer visible brush marks. It also covers large surfaces much faster than traditional painting methods.
Can beginners use a paint sprayer?
Absolutely. Many modern sprayers are designed with DIY users in mind. Practicing on cardboard or scrap wood before spraying cabinet doors helps build confidence and improve technique paint sprayer for kitchen cabinets.
Do I need to thin cabinet paint?
That depends on the sprayer and the paint. Some airless sprayers can spray many latex paints directly from the container, while some HVLP sprayers may require thinning. Always follow the sprayer and paint manufacturer’s recommendations.